Setup Amazon S3 Storage in Rig
This document provides instructions on how to setup Amazon S3 Storage in Rig the dashboard. The flow for setting up S3 Storage using the CLI is analogous to this flow, just in the CLI.
Prerequisites
Before you can setup Amazon S3 Storage in Rig, you need to have an AWS account. If you do not have one, you can create one here. You also need to setup Identity and Access Management (IAM) storage permissions for Rig to be able to access your S3 Storage. Lastly, you need to create a set of Access Keys, which is used to authenticate Rig with AWS S3.
Adding Amazon S3 Storage to Rig
To add Amazon S3 to Rig, you simply need to input the Access Keys and a default region to Rig. This can be done either using the dashboard or the CLI. The general flow for creating a provider is described in the providers documentation.
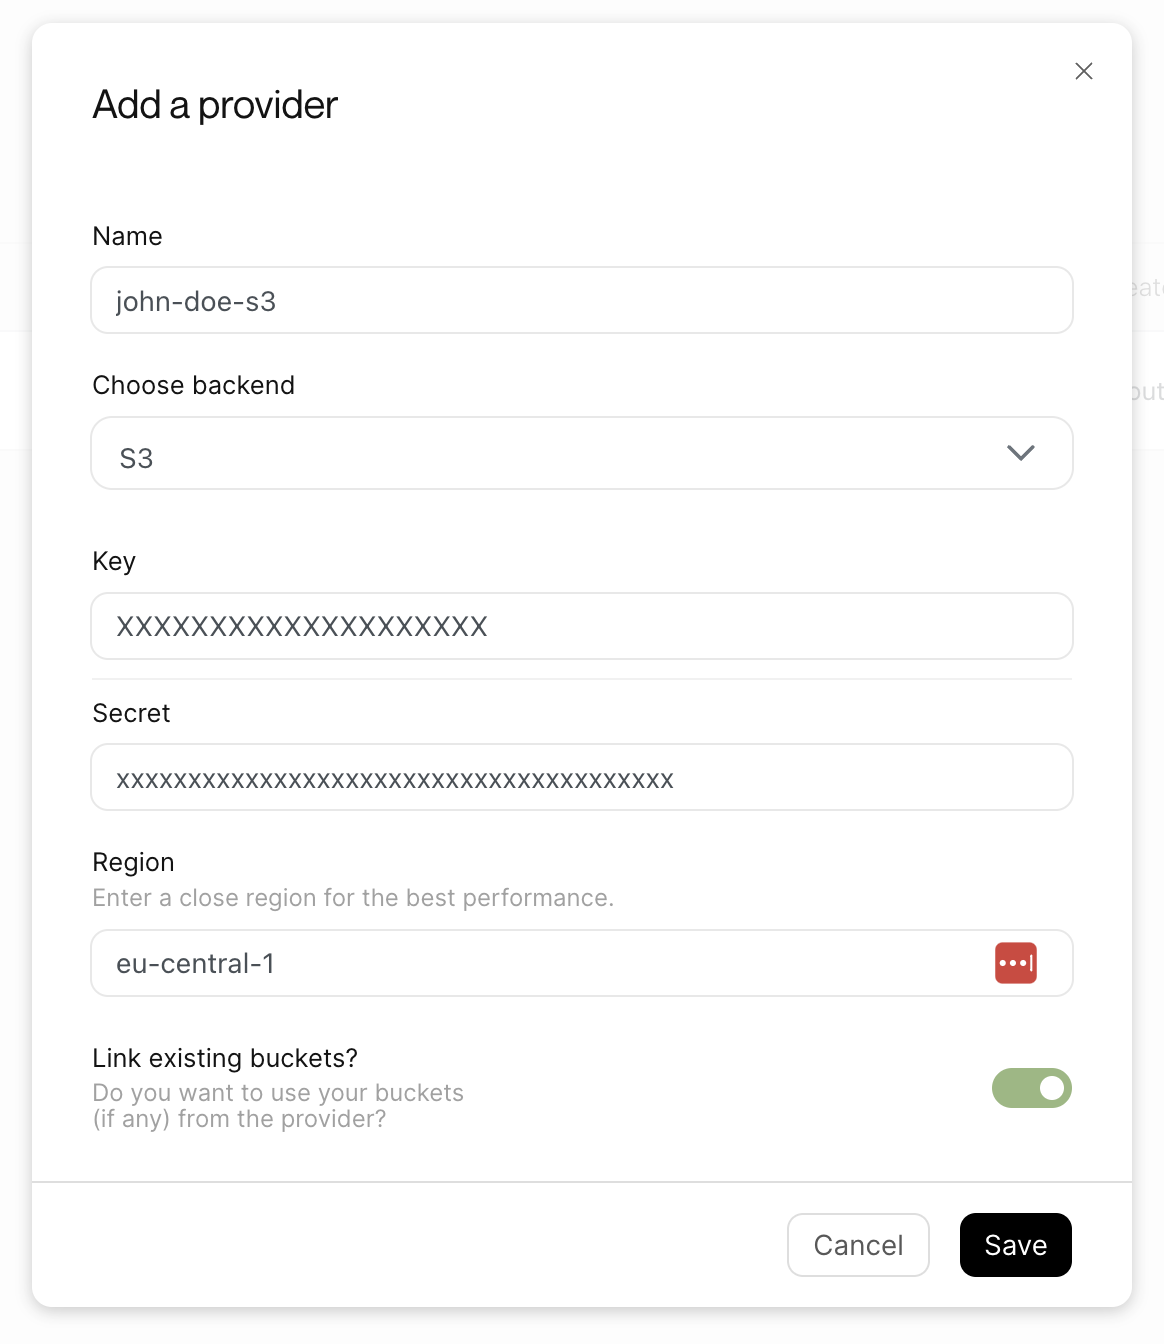
Using the dashboard, you can add the access keys to Rig by navigating to the Storage page and clicking Add Provider. This will open a modal, where you give your provider a unique name, select S3 as the provider type, and enter the access keys and default region for your AWS account.

If you link existing buckets, Rig will automatically create a Rig-bucket for each bucket in your S3 account. Otherwise, the provider will appear empty until you create a bucket.
Creating Buckets and Uploading files
Once you have created a provider, you can create buckets and upload files to them. The general flow for this is the same as for all providers and is described in the buckets documentation and the upload files documentation.
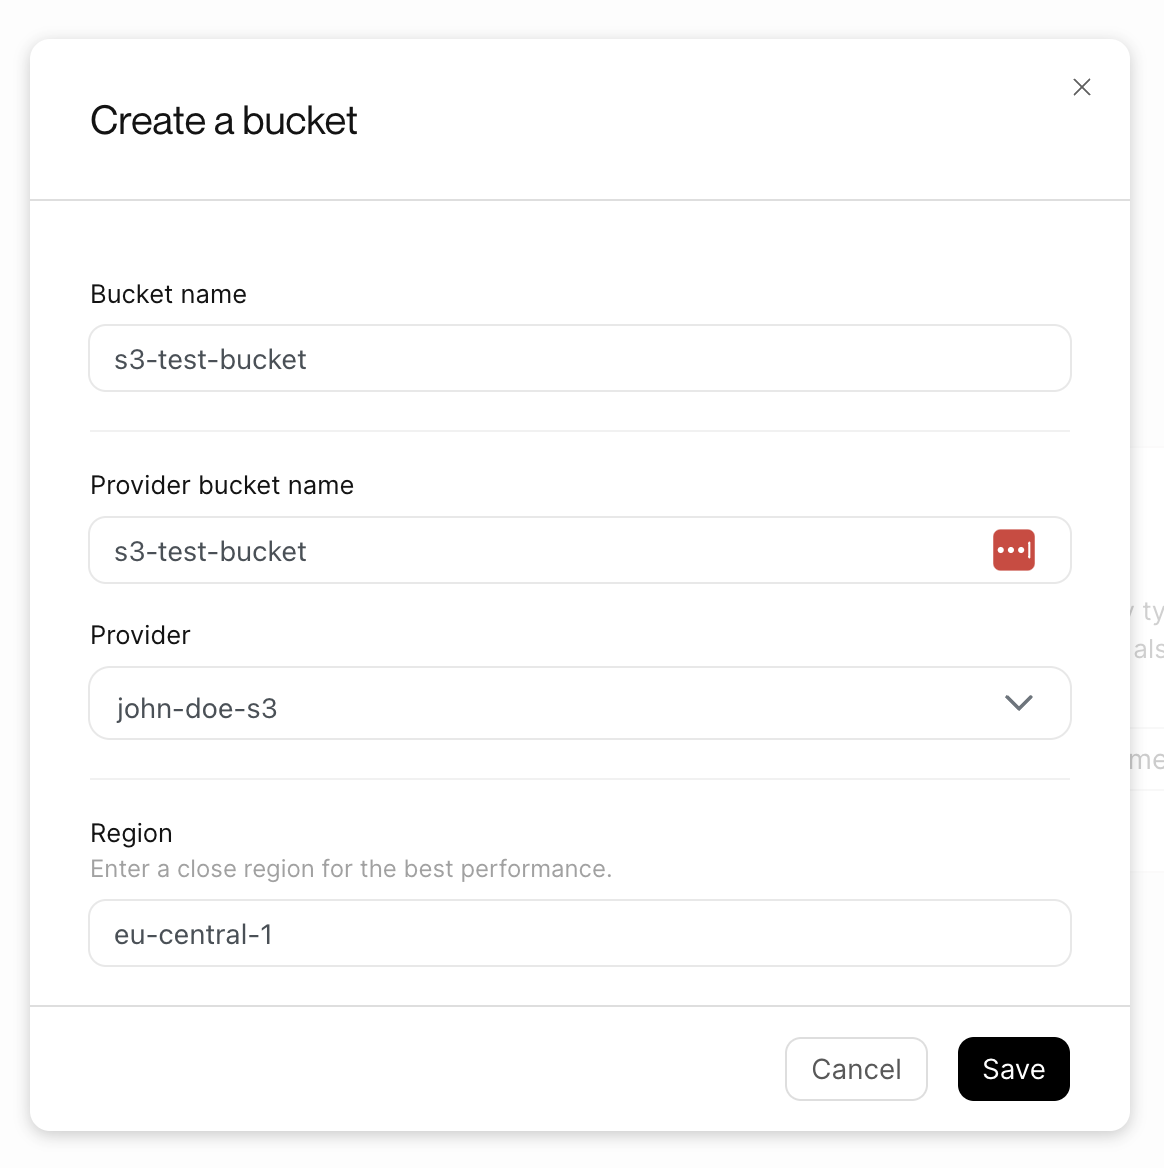
In the dashboard, you can create buckets by navigating to the Storage page and clicking the "New bucket" button. This will open a modal, where you can give your bucket a name, and a provider bucket name, select the provider you want to create the bucket in, and enter a region for the bucket. This region must match one of the regions supported by the given provider. For AWS this is described here.

After a bucket has been created, it is possible to upload files to the bucket. This flow is described in the upload files documentation. In the dashboard, you can upload files by clicking the upload files button on the bucket page.